So, I know I just gave you a dessert recipe. I know.
I also know that I outlined my unpopular opinion on Valentine’s Day in last week’s post, and now it would appear that I have made you heart-shaped chocolates. But I feel like that’s OK, because Valentine’s Day is over. I’m a weird kind of stubborn sometimes… Also, the only ice cube trays I own are those heart-shaped ones from Ikea. So, there’s that. But you should totally make these next time you have a date over, because they’ll probably fall for you immediately (if they haven’t already).
And I know you may be a bit chocolate-d out from all the chocolate you may have consumed since last Saturday. But for me, there is no such thing as “chocolate-d out,” and I don’t think I’m alone. So I am honoring this month’s Recipe Redux theme, “Favorite Chocolate Matches,” with a super easy, delicious truffle recipe.
Amidst this extremely busy (and freezing) week, simple was the best way to go. I had been planning some kind of cocoa chili, but then earlier this week I made cinnamon chili instead, because I was 100% hungry and only about 60% adventurous. Such is the life of a grad student.
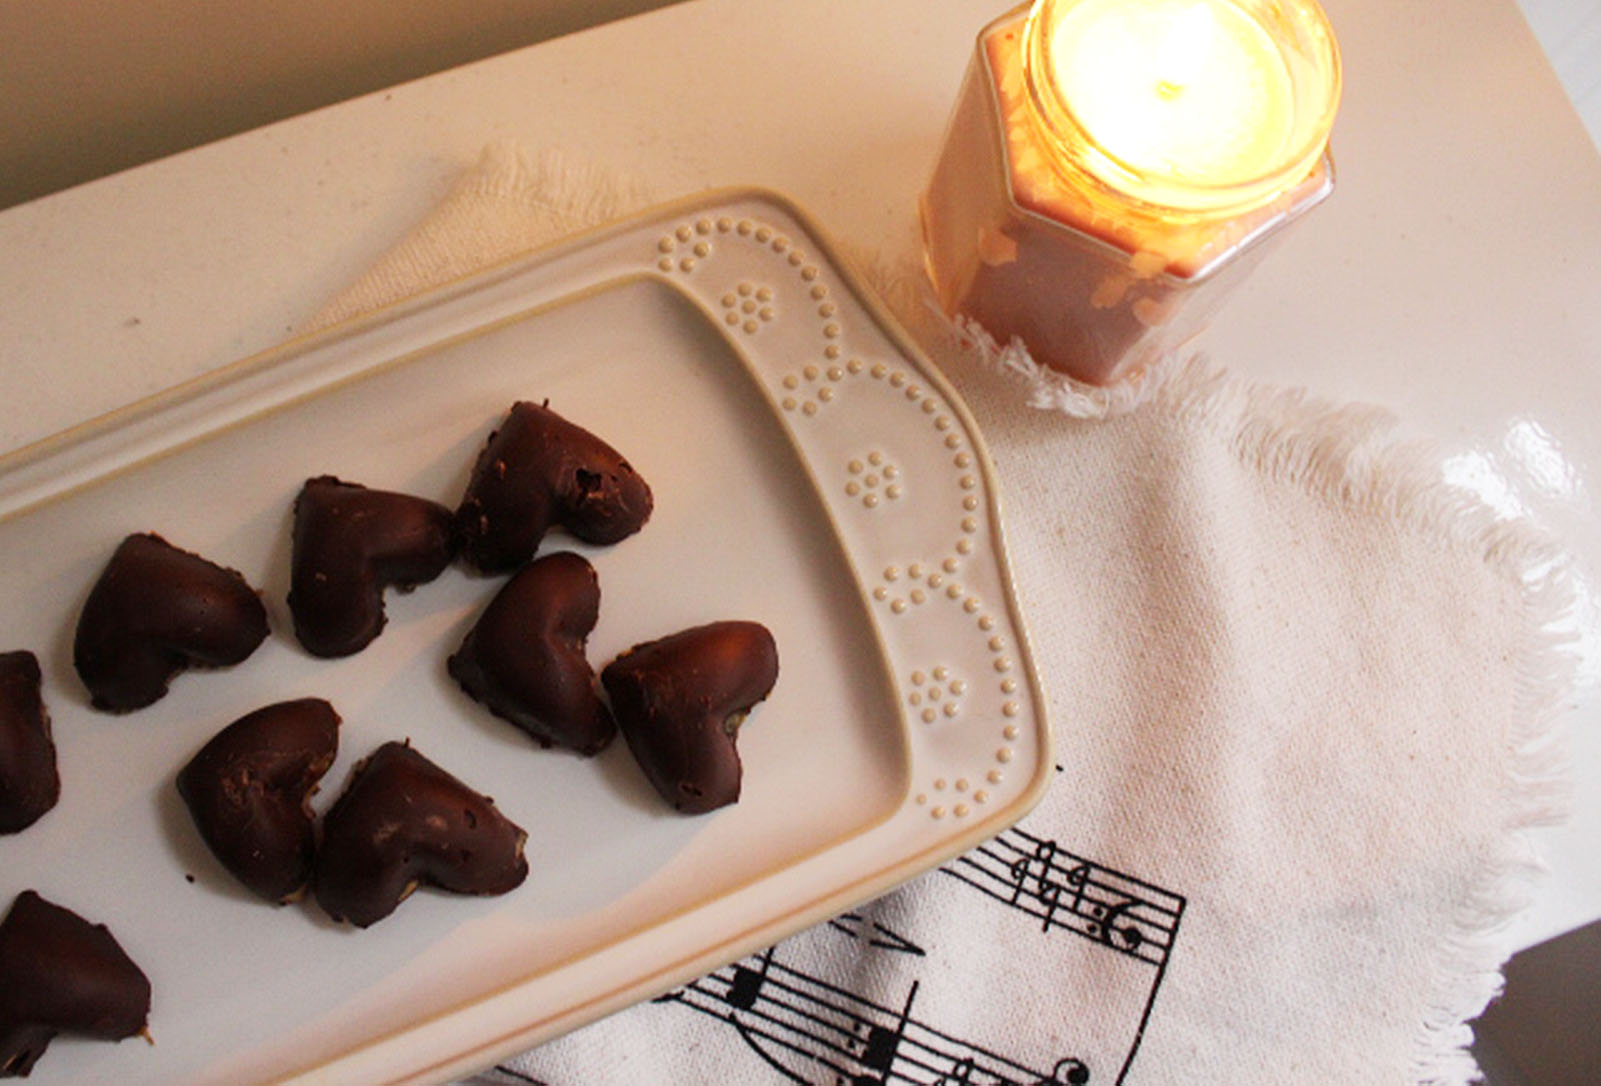
And so this morning, on the morning OF this post’s due date, I still did not have a recipe. Oops. Although, in the true nature of the challenge (which was to find a way to use leftover chocolate), I used two other leftover household staples to make these little nuggets of heaven – peanut butter and dates. So many of my favorite candies boast the peanut butter-caramel-chocolate trifecta, and dates are a perfect healthy way to simulate the texture and flavor of caramel.
I made these before heading off to see a student, popped them in the freezer, and they were perfectly set by the time I got home. Then, I had just enough time to pop them out of the mold and photograph them before I went out to rehearsal. If that’s not proof that these are low-maintenance, I don’t know what is. And I’m kind of high-maintenance. But these honestly taste super fancy, so nobody will have to know your secret 😉
Combine mashed dates with a pinch or two of sea salt. Combine and set aside.*
Spoon a small amount of dark chocolate into each section of a silicone ice tray or mold. Using the back of a teaspoon, spread the chocolate to thinly coat the bottom layer of each section. This layer should still be thick enough that you can’t see any of the tray through the chocolate.
Place in freezer to set bottom layer, about 5 minutes.
Fill each mold about 2/3 of the way up with mashed dates.
Fill the rest of each mold evenly to the top with peanut butter.
Thinly spread the rest of the chocolate on top of each candy (i.e. don’t cover the whole surface of the tray/mold with chocolate).
Return to freezer until set, about 1 hour.
Notes
*If necessary to help with mashing, microwave the dates first for about 20-30 seconds.
I have a confession to make… I’m boycotting Valentine’s Day. *cue dramatic gasp*
If you’ve been following my blog for a while, you may even recall last Valentine’s Day, when I officially dubbed February 14th “Violin-tine’s Day.” (Note to self: Totally making that more of a thing again this year.)
Now, I know what you’re probably thinking. Sarah, you’re just a crotchety ol’ Scrooge because you’re single on Valentine’s Day. Well, OK, that last part might -technically- be true. In reality though, I’m actually a huge romantic. I’m a total sucker for the cheesiest things! Eating my food and telling me I’m pretty usually does the trick too, though. I’m not difficult to please. (Edit: I can actually be pretty difficult to please. Maybe that’s why I’m single on Valentine’s Day…)
For me though, true romance is unconditional, and there’s something about having a holiday specifically for it that just feels forced. You know wha’m sayin’? I truly believe that showing someone else how much you care should be an all-the-time thing, and needs no occasion. Regardless of how you show it, every day should be like Valentine’s day.
Not to mention, the holiday does kind of put a lot of undue pressure on single folk. I have friends who really dread Valentine’s Day, and THAT makes me sad more than anything. I also get it, because I used to feel the same way.
So that’s why I say, celebrate self-love this Valentine’s Day! Regardless of who you choose to date, marry, etc., only you get to spend your whole life with you. Just like only you get to eat this cookie pie.
Aaaand so, that was my long winded way of explaining why I made you a recipe for one. And it is a reallllly good one. This is the gooiest cookie pie ever, and you’ll never know it’s egg and dairy free.
So I say, make and eat a whole freakin’ cookie pie by yourself this Valentine’s Day (or, any day). Then top it with some dairy-free ice cream, because why the heck not. This cookie pie will be there waiting just for you, because you deserve it. Also, because it’s vegan (and gluten free), that pretty much means it’s healthy by default. Right? Usually wrong. But today, right.
And if you are planning to spend your Valentine’s Day with someone special, you could just as easily double the recipe. Why split a dessert when you can each have your own? Everybody’s happy, and nobody has to fight over who gets to eat what part or who gets the last bite. See? I’m saving relationships everywhere.
“Ew, Sarah, why would you EVER put sea salt and bananas together?” – You
What can I say, I’m good at reading minds. But you know what I was slightly less good at until recently? Baking banana bread. It has literally (and I mean literally, not figuratively…there is, in fact a difference) taken me YEARS to come up with the perfect banana bread recipe. I posted one back in my Tumblr-blogging days that I’m pretty sure consisted mostly of chia seeds. Not to hate on chia seeds (they have their time and place), but this recipe is tastier for sure, and just as healthy. Now, to address your sea salt inquiry, it’s pretty much universal knowledge these days that sea salt and dark chocolate are the new power couple. Caramel tries to make it a love triangle, but I am definitely on Team Chocolate. And lately, I have been putting dark chocolate in and on everything I can get my hands on.
Why?
Well, I’m celebrating, because (Spoiler: if you follow me on Instagram, then neither of the following things are going to be “big news” to you) after a whirlwind year of suddenly changing plans and deciding NOT to take a year off, I took graduate auditions and was accepted to everywhere I applied! I’m going to be pursuing my Master’s degree next year at the conservatory of my dreams in New York City, and I couldn’t be more excited. I also gave my senior recital a few weeks ago to a lot of positive feedback, which means I officially CAN graduate and go to New York City. Also, Ithought the performance went well had a lot of fun giving it, which for self-doubting and perpetually unsatisfied me was kind of big.
So, yeah… I’m declaring that I now deserve to put chocolate in everything. You can judge me or whatever, but you’re going to be thanking my little chocolate binge when you taste this banana bread. Notice I said when, not if, because that’s how sure I am that you need to make it immediately.
Just in case you’re not convinced yet and need a REALLY compelling reason to make it (other than that it’s chocolate banana bread and because I said so), it will use up your ugly, mushy, seemingly inedible bananas. I bet you’ve thrown out some spotty/browning bananas in your time, thinking they were unusable. Think again, my friend – your banana-wasting days have passed, because for this recipe and banana bread in general, the spottier the better! (Unless they’re actually rotten and wrinkled… Then you probably shouldn’t cook with them. :P)
These are what perfect banana bread bananas look like. <3
Also, this bread came out super moist, and has just the right texture! You could also omit the chocolate chips or walnuts (or both) and the base recipe would come out fine. I will definitely be keeping this as my go-to banana bread recipe!
1 cup unbleached whole wheat flour + 1/2 cup oat flour (may do 1 and 1/2 cups oat flour for gluten free alternative)
1 tsp. baking soda
1/3 cup 60% dark chocolate chips, plus 1 tbs. for melting
1/4 cup walnuts
Sea Salt
Instructions
Preheat oven to 350˚F.
In a mixing bowl, mash peeled bananas thoroughly until mostly smooth. Some small lumps of fruit will remain, that’s ok!
Mix in melted coconut oil, maple syrup, and vanilla, and then add the egg/egg white (adding the egg and coconut oil too closely together may cause the egg to cook in the hot oil).
In a separate bowl, combine the remaining dry ingredients (except for the 1 tbs. of chocolate chips for melting), and then slowly mix the dry ingredients into the wet.
Pour batter into a greased loaf pan.*
Melt the remaining chocolate chips, pour onto the batter, and swirl with a fork. Sprinkle the top lightly with sea salt, and bake for about 45-50 minutes, or until a toothpick inserted in the center comes out clean.
Notes
*I recommend using coconut oil spray, which I swear by for baking, roasting, and sauteeing! So flavorful, and so much better for you than most non-stick sprays.
Well, friends, I have officially reached the home stretch. My graduate auditions start on Sunday in New York, and things are starting to feel very, very real. Until they’re over, my days will be filled with a lot of mental preparation, meditation, and positive thinking (not to mention, lots of practicing). When all that eventually proves exhausting (which it will), this chocolate cake should be a pretty decent substitute. This recipe was created on an impulse yesterday, when my teacher called me at 2:45 to ask why I wasn’t at my lesson. I had misheard her and written my lesson time down for 3:30, but she had actually told me 2:30. Although it was an honest mistake and I’ve never done that before, I was really frustrated at myself and the situation. Since I was already having a pretty bad day to begin with, I turned to the only remedy I could think of – chocolate. For a chocoholic, bad day + bad luck + chocolate = good day. Always.
For those of you who don’t already know, I am also a tea-holic. I gave up coffee over a year ago, and have found that I’m now so detoxed from caffeine that I’m essentially unable to drink it without feeling sick (you may use your one complimentary eye-roll now). I occasionally have tea in the morning, but I almost always have a cup before bed because I just reeeeeally really love tea. If you’re having a hard time visualizing my obsession, my roommate bought a next-to-the-Keurig organizer for our living room over winter break, and its contents are 90% my tea boxes and 10% K-Cups. Oops. I’ve also been buying teas faster than I can actually use them, so I figured it was time to start using my tea stash creatively.
The last element that went into the creation of this beautiful cake was the container of coconut cream I had in my fridge waiting to be used. Coconut cream is the delectable layer of dense, rich, creamy, coconutty deliciousness that can be found when a can of coconut milk is left to separate in the refrigerator. With a little bit of cocoa powder, maple syrup, and a lot of lactic acid (thanks, biceps!) I turned the cream into a smooth and fluffy mousse, and the Chocolate Chai Mousse Cake was born.
I used a fancy pan that I bought from Ikea to make this cake, because I’ve had it for months and it was just begging to be broken in with something delicious. However, you don’t have to be fancy, and could even make this into a thin layer cake by dividing the batter into two round pans and then putting the mousse in the middle instead. Since you won’t get to see how awesome this pan is in any pictures of the decorated cake, heres a picture of it pre-decorated in all its beauty:
1 and 1/4 cups whole wheat pastry flour (I used Bob’s Red Mill)
1/4 cup cacao powder
3/4 cup coconut sugar
1 tsp baking soda
1 cup (8 oz.) boiling water
1 bag of chai tea (I used Spiced Rooibos Chai from Trader Joe’s)
1/4 cup coconut oil
1 egg
1 tsp. pure vanilla extract
Mousse
Cream from one can of full-fat coconut milk (leave can in refrigerator upside down for a day or two, then open right side up and scoop out the cream)
1/2 tbs cacao powder
1 tbs. maple syrup
Instructions
Preheat oven to 350˚F.
In a mixing bowl, stir together whole wheat pastry flour, cacao, coconut sugar, and baking soda.
Bring 8 oz of water to a boil (I just microwaved a mug with 8 oz. of water for 3 minutes) and let your tea bag steep for 5-10 minutes, depending on the intensity of flavor you want. Once steeped to your liking, remove your tea bag and drop the coconut oil into the hot tea to melt it.
Once completely melted, pour the tea/oil mixture into your dry ingredients, mix to combine, and set aside. In a separate bowl, whisk egg and vanilla and then stir into the cake batter.
Pour batter into a cake pan and bake for about 25 minutes, or until the mixture is set and a toothpick inserted in the center comes out clean. Let cool.
Mousse
Combine the coconut cream, cacao, and maple syrup, whisking heavily until fluffy and completely combined.
Notes
If your coconut cream is very solid and you’re having a hard time mixing, you may choose to gradually add some of the leftover coconut milk from your can until the mousse is at a satisfactory consistency. Do not put the mousse on the cake until it has cooled completely! Decorate with sprinkles or dust with a little bit of cocoa.
For those of you who follow me on Instagram, you know my love affair with Chobani Greek yogurt has gotten pretty serious. Well, at least on my end. (Although they did send me three coupons and a free case of yogurt which arrives tomorrow, so maybe it’s more of a prom-couple-that-dates-for-the-convenience type of deal. Whichever it is, I’ll take it!) Unfortunately, I went through a period last year where I couldn’t eat lactose and it was the gentlest form of torture. So now that those circumstances are in the past, I have been putting Chobani in ALL of the things.
My newest Chobani adventure began when I decided to try something I’ve been seeing on a lot of different blogs:
Greek Yogurt dipped strawberries.
But of course I’m not just going to dip the strawberries in yogurt. I’m going to cover them in all sorts of goodness too.
I may be lazy, but I found the easiest way to go about dipping the strawberries was straight into the brand-new container of Chobani. Just stir to make it creamy and then dip away! The strawberries will come out evenly coated with a nice thick layer of yogurt.
I placed the dipped strawberries in a Pyrex baking dish that I lined with parchment paper to keep the berries from sticking. For toppings, I decided to make the berries like an Almond Joy (which is my favorite candy of all time besides sour gummi worms. I know, I’m a five-year-old) and use unsweetened coconut, crushed dry-roasted almonds, and dark chocolate.
Once the berries were dipped in the yogurt and sprinkled with the coconut/almonds, I popped them in the freezer to let the yogurt shell harden a bit (about 10 minutes). Then, I drizzled them with a combination of 1 tablespoon dark chocolate chips (melted) and water, and froze for another 10-15 minutes until the shell was hardened.
TIP: Serve immediately, before the berries get too hard to bite into!
HEY THERE!
Welcome! I'm Sarah, a violinist, culinary instructor for musicians, and blogger here at The Hungry Musician. Click here to read more about me!


